Map device systems across several levels
Devices that are used together can be combined into a device system in Samedis.care, for example an endoscopy tower consisting of an equipment trolley, a documentation system, a monitor and a cold light device. A device system can have several levels. In this tutorial, we’ll take a look at how to assign devices to each other and display the device system.
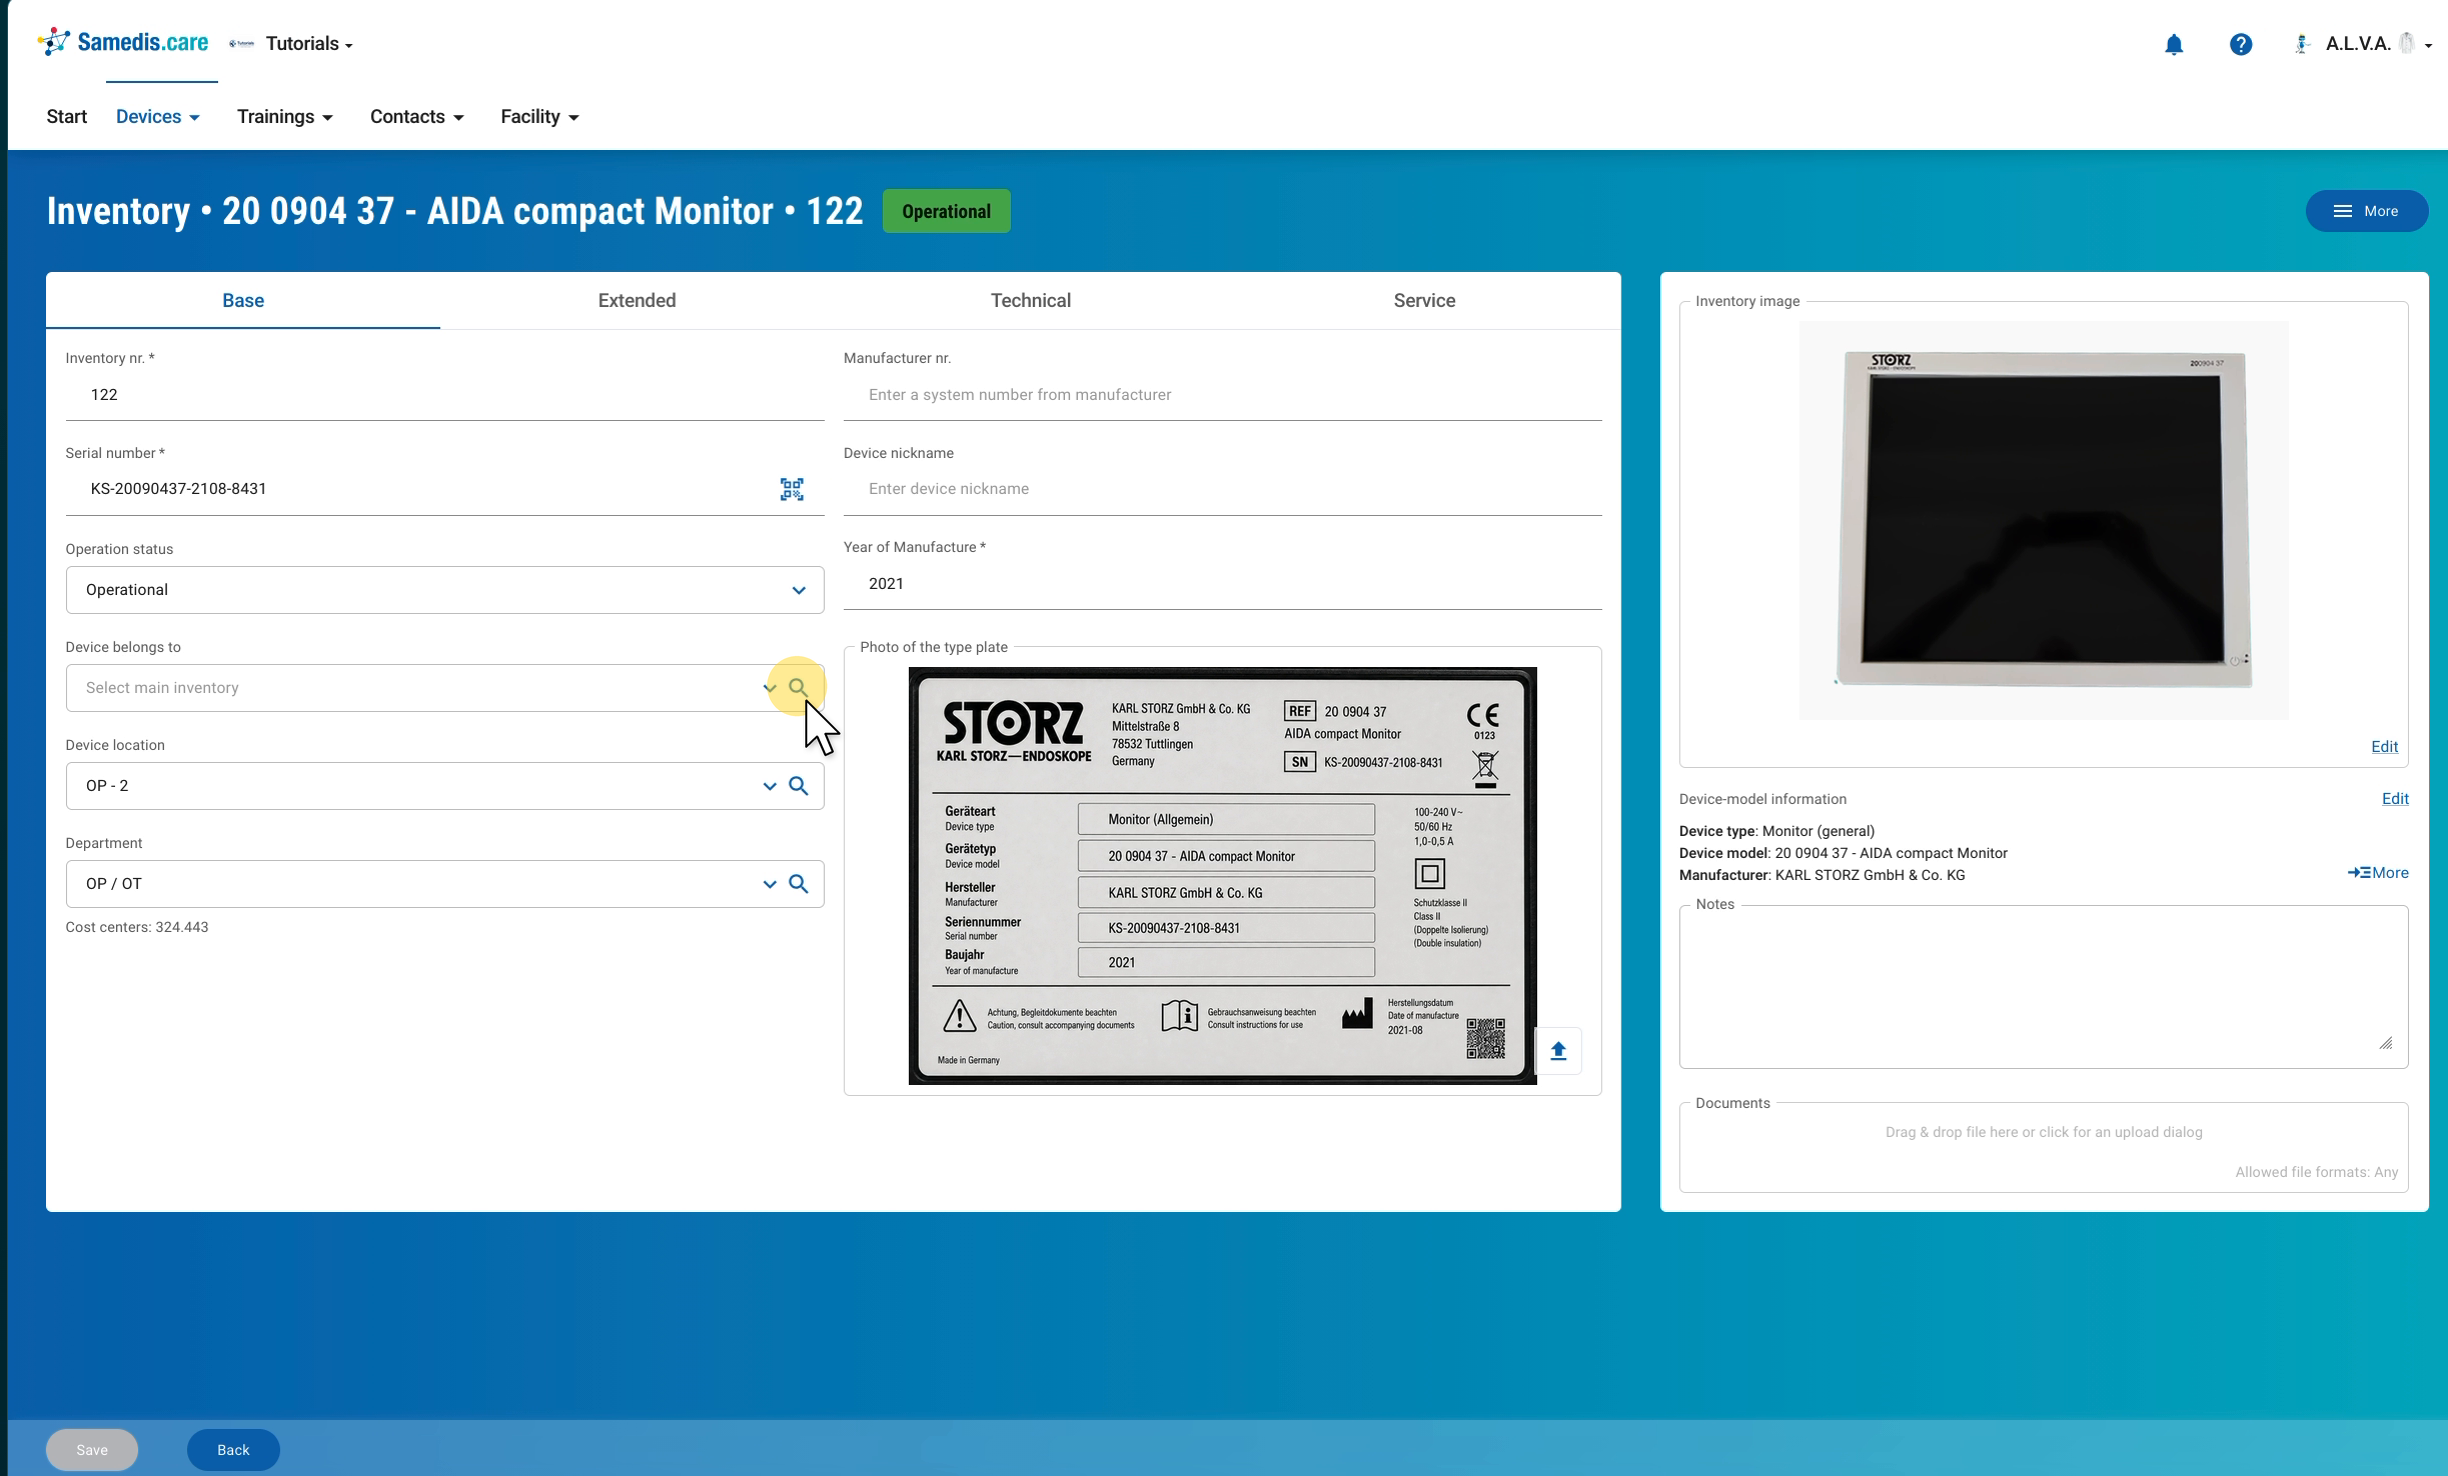
1. Set the parent device
Open the device that belongs to another device and, on the Base tab, click the magnifying glass in the Device belongs to field. In our example, we assign the documentation system to the equipment trolley.
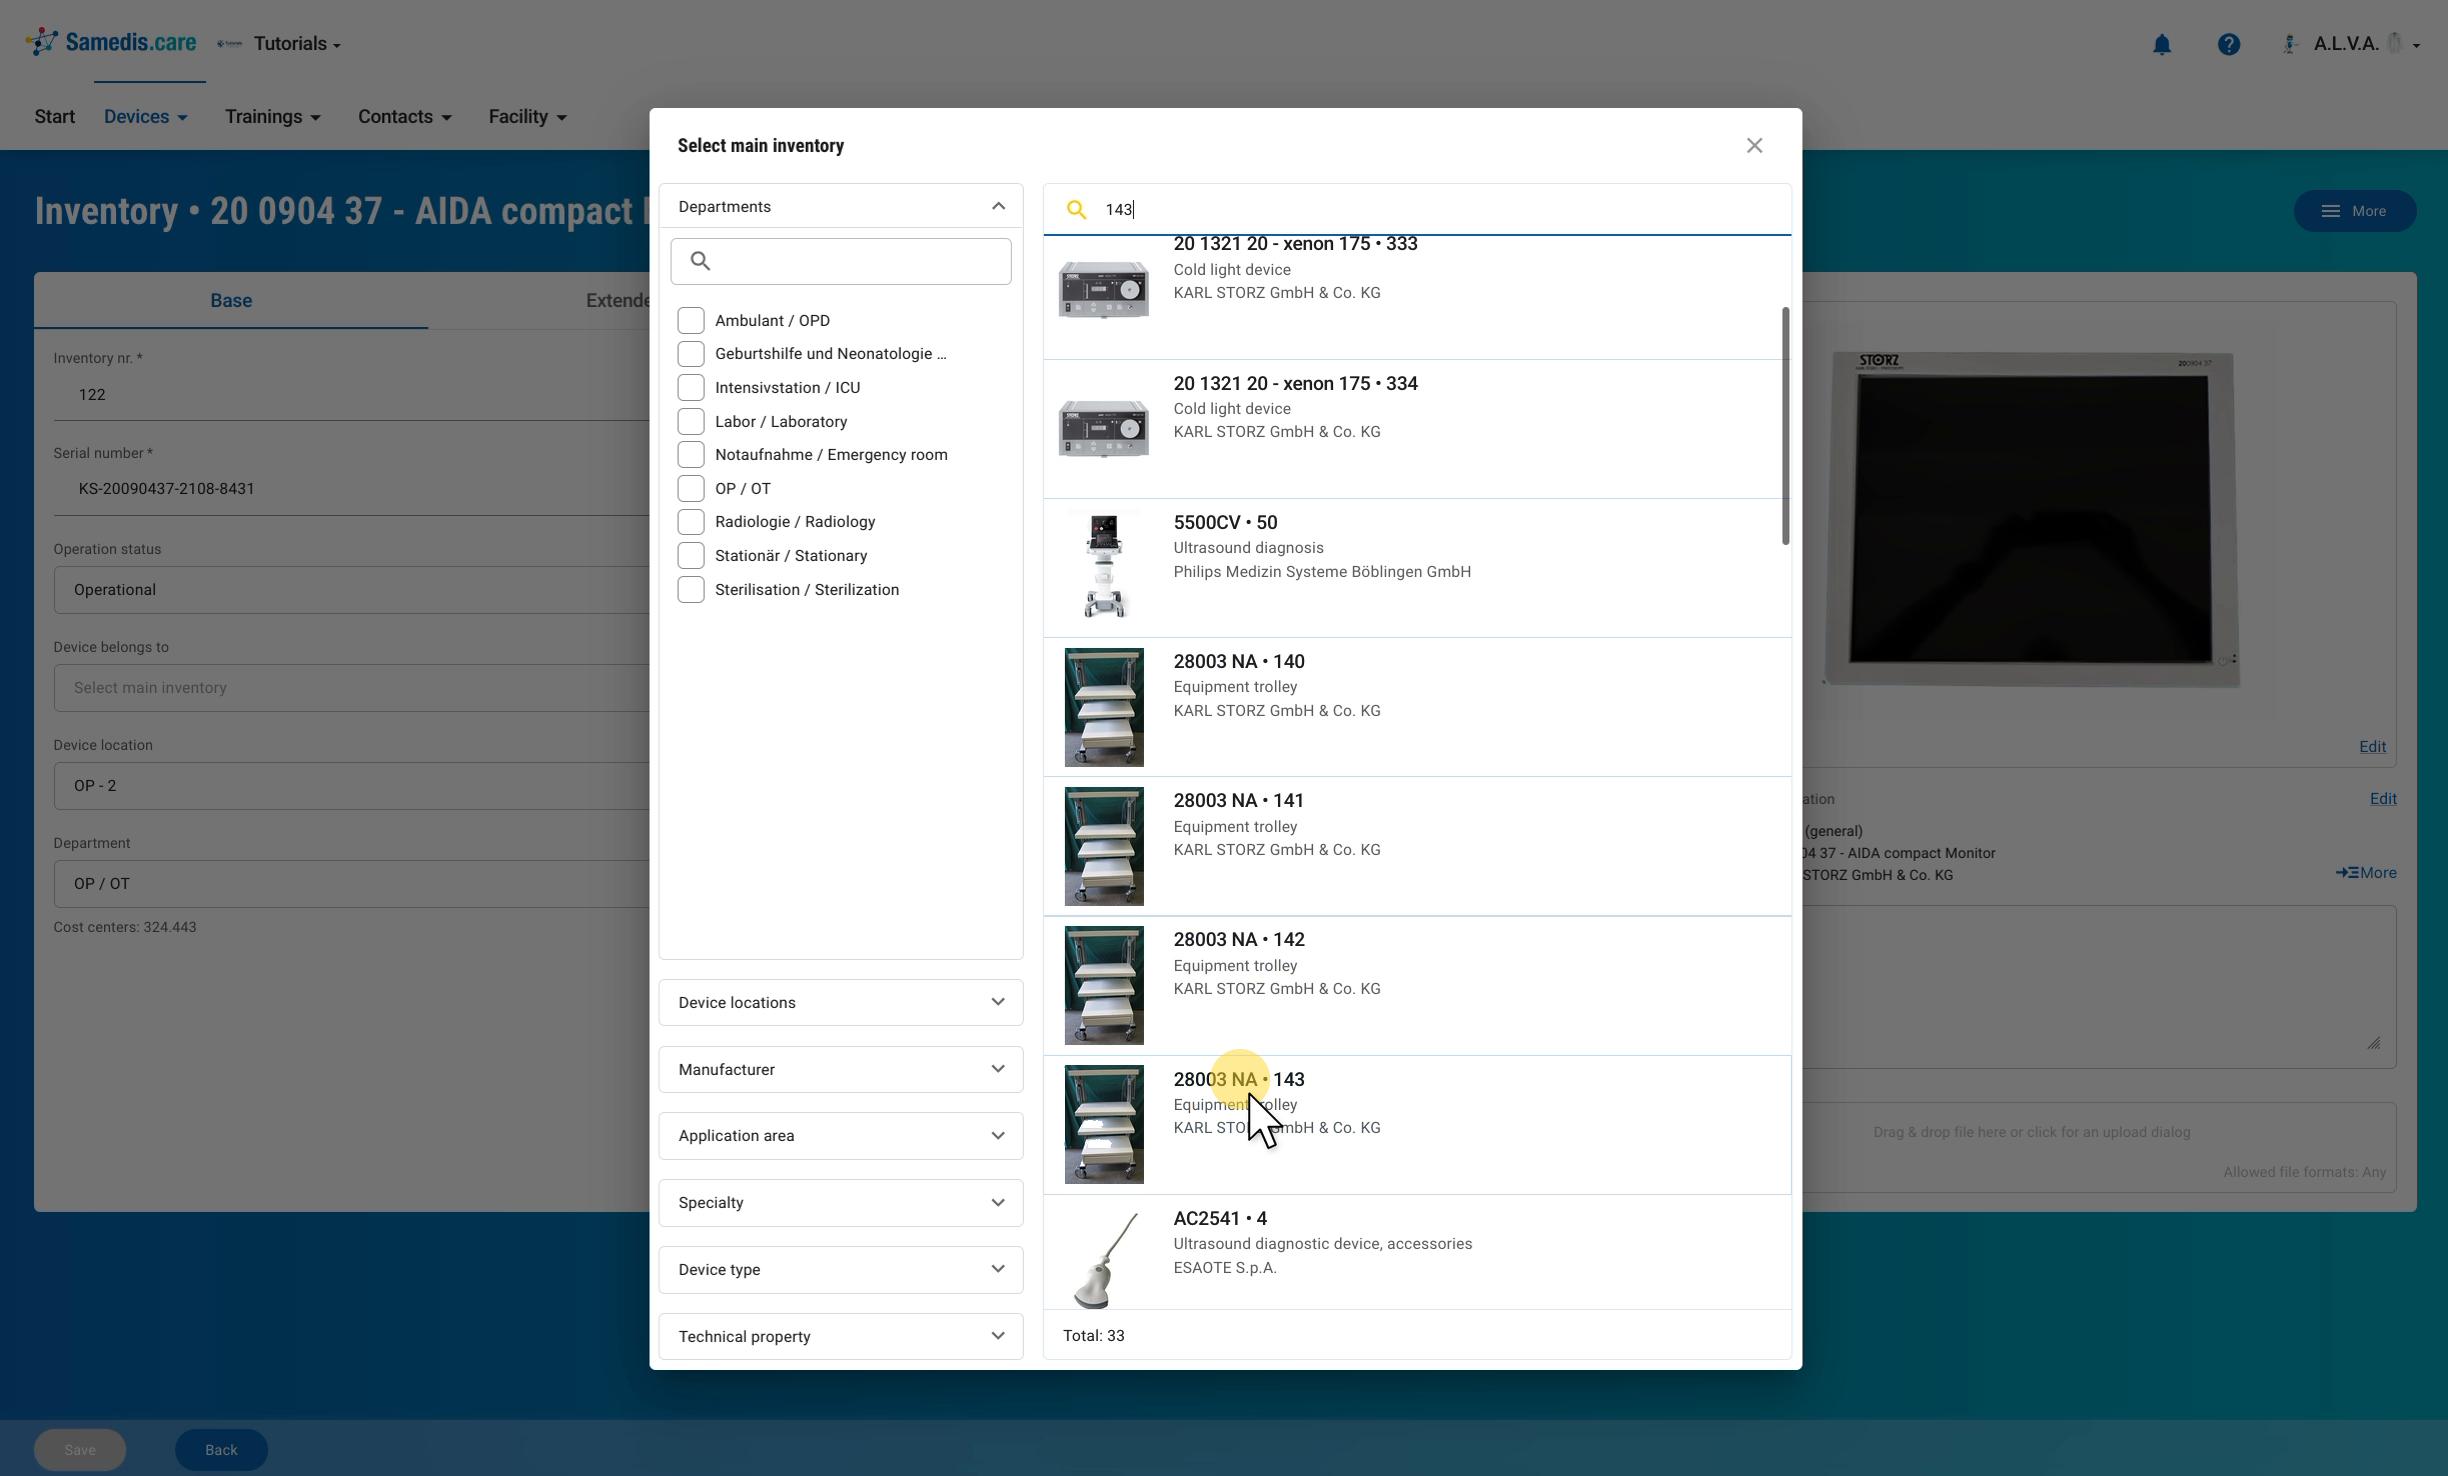
2. Select the main inventory
In the Select main inventory window, search for the parent device, for example by its inventory number, and click it. On the left, you can narrow down the search with filters such as Departments or Device locations. Then click Save at the bottom.
Tip
A device can’t be assigned to itself. For the top device of a system, the note “This device is the main device.” appears below the field.
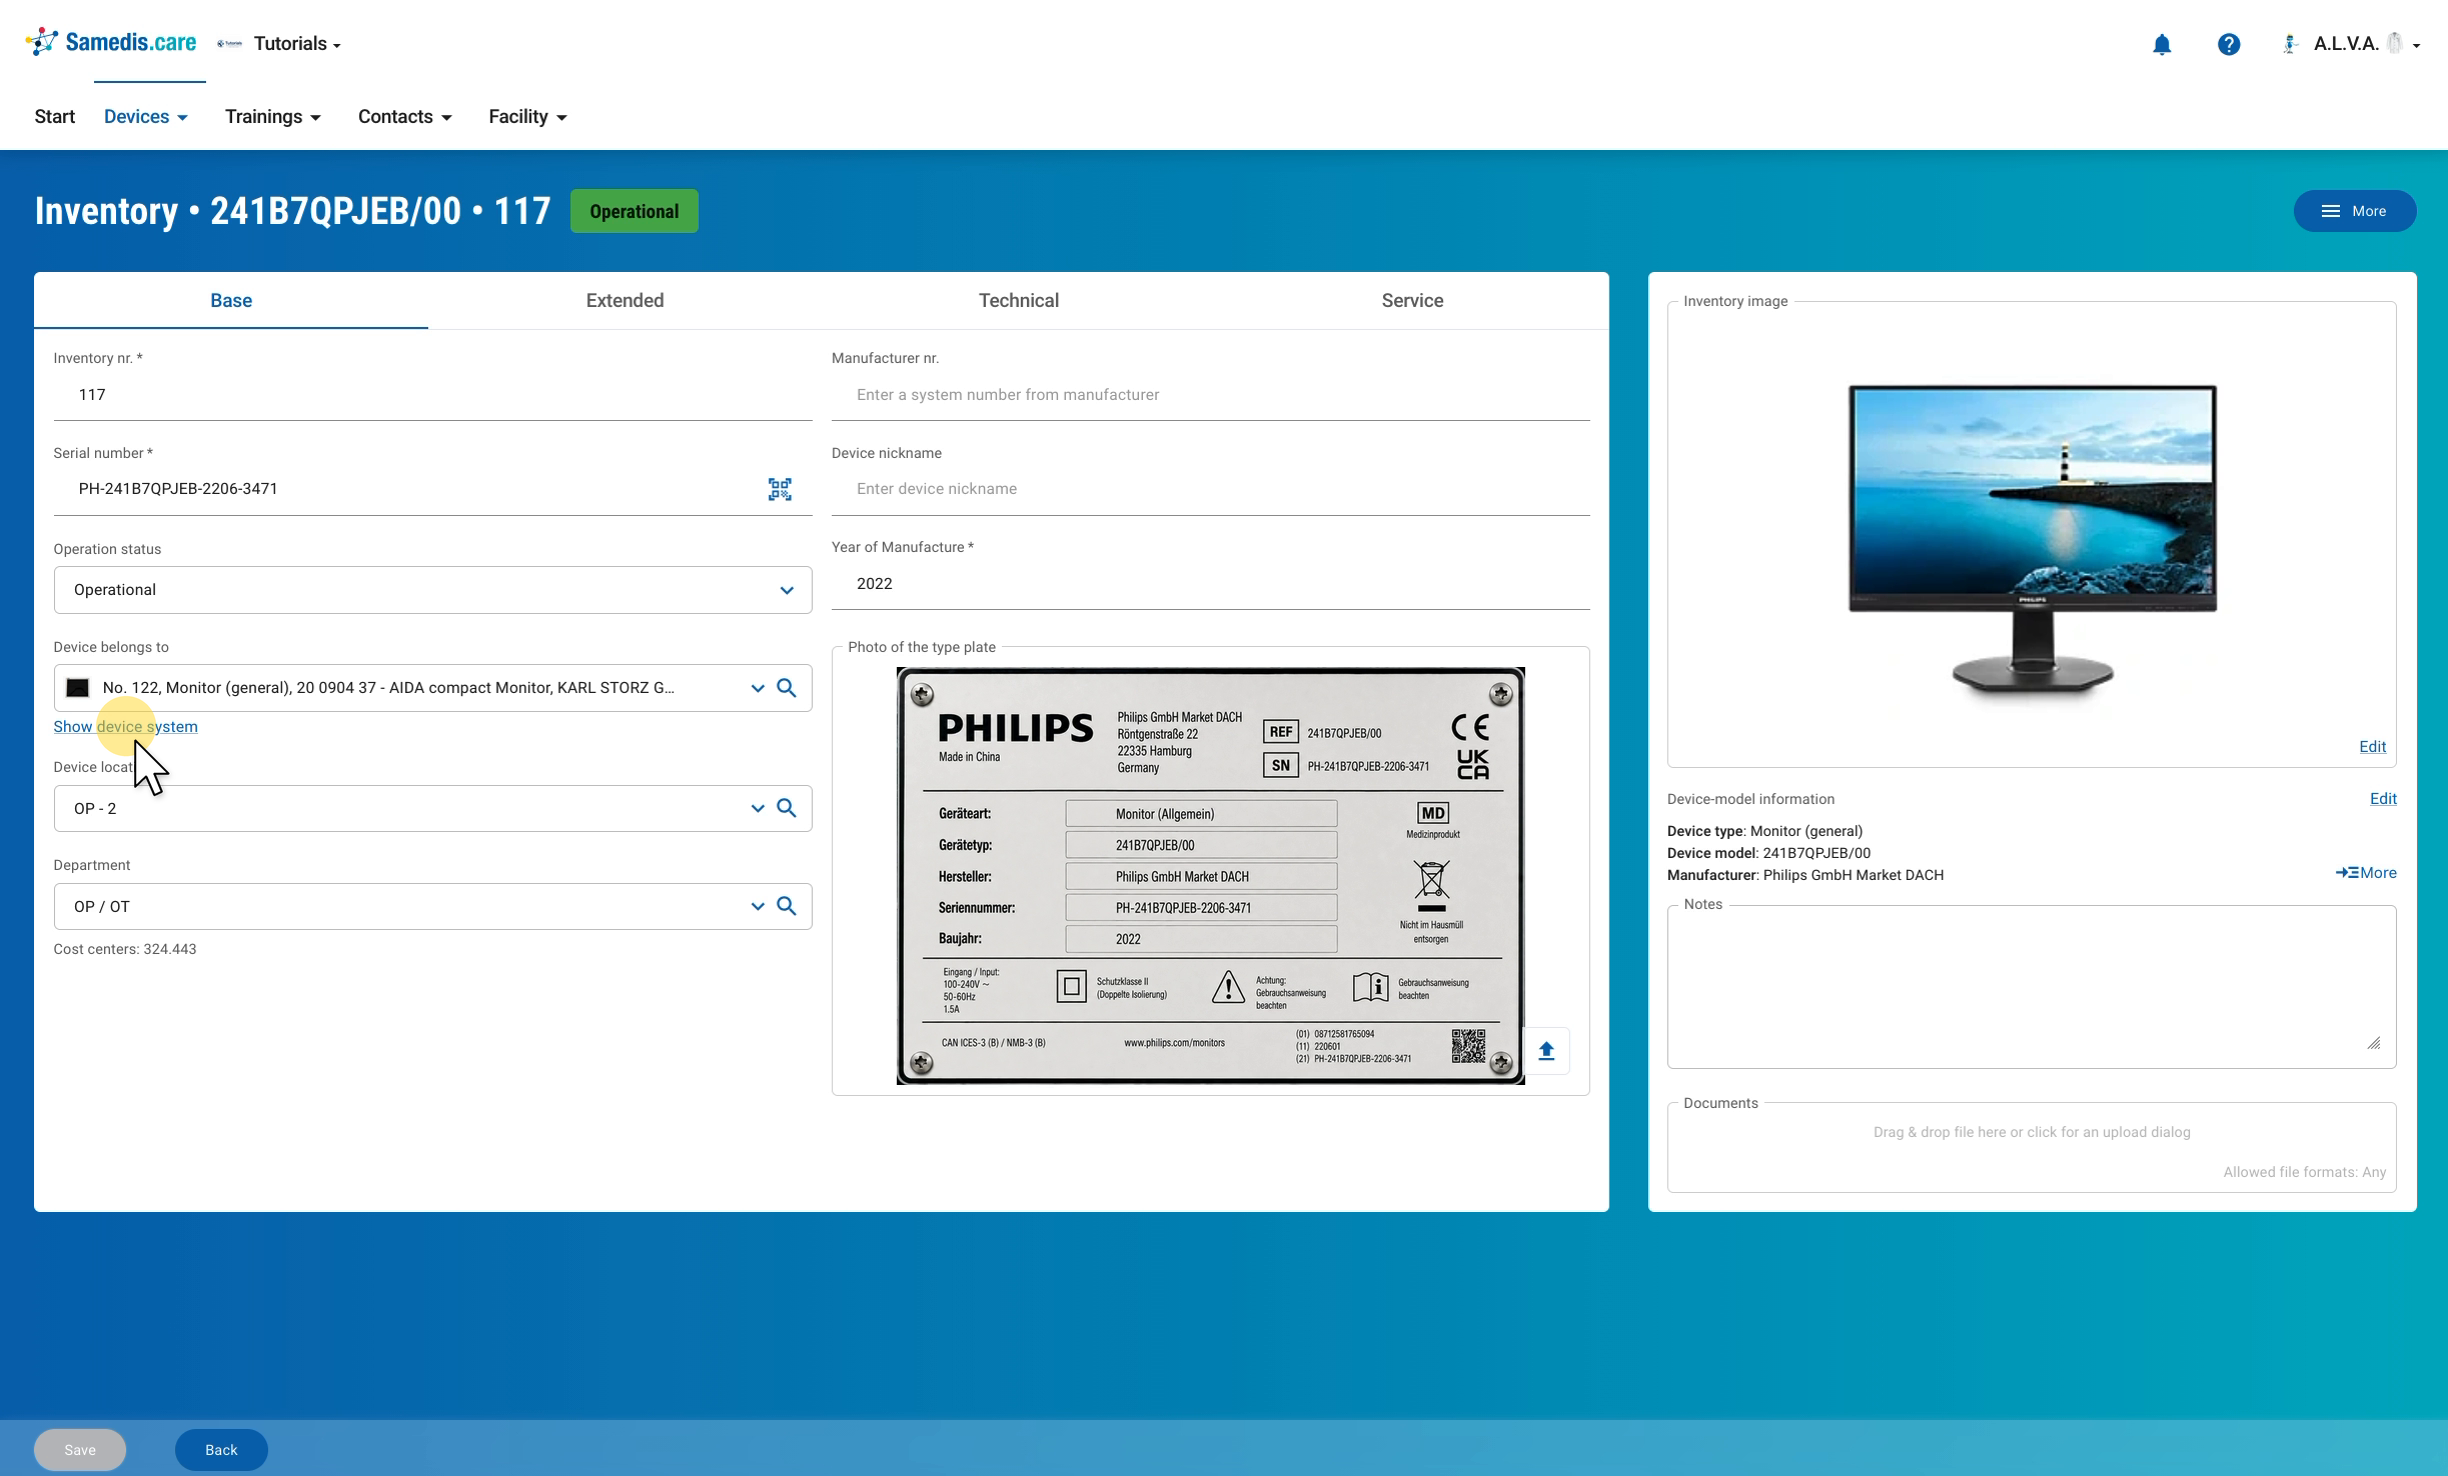
3. Build several levels
A device that belongs to a system can itself be the parent device for other devices. In our example, the monitor belongs to the documentation system, which sits on the equipment trolley. To do this, assign the device as in steps 1 and 2. Then click Show device system below the field.
Tip
In the device list under Devices › Device data, the Belongs to inventory column shows which device a device belongs to.
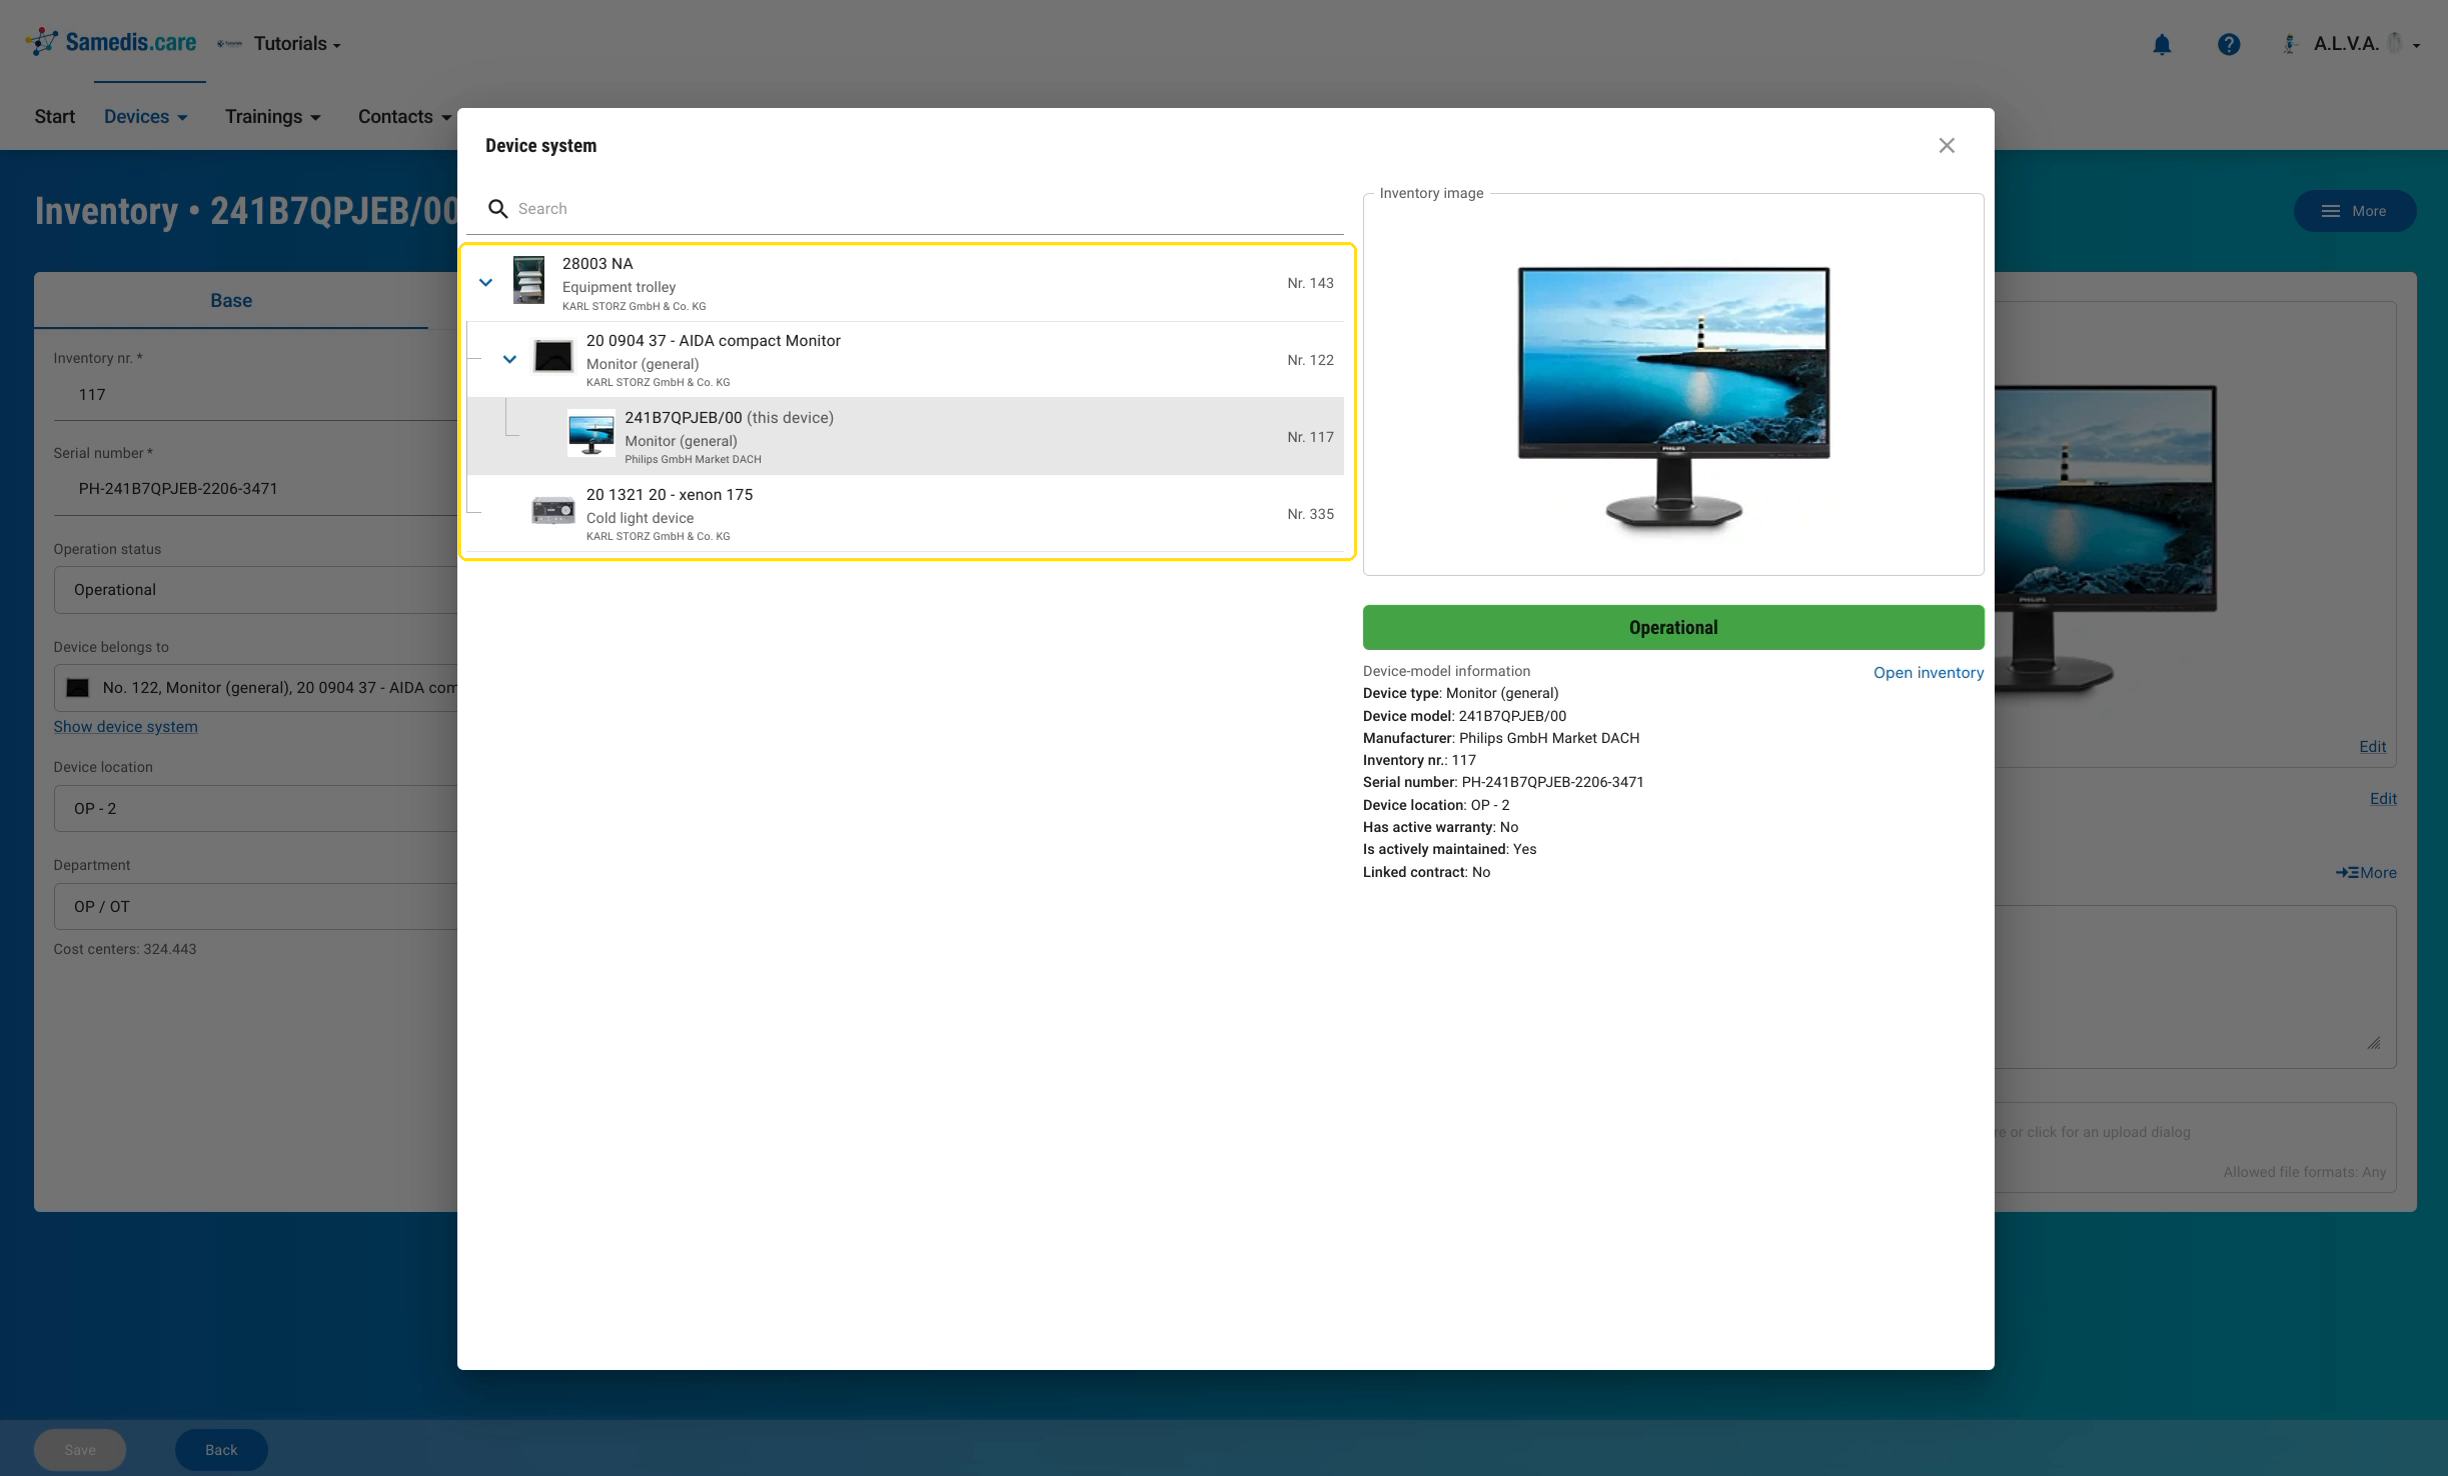
4. Display the device system
The Device system window shows all devices of the system as a tree: the main device at the top, below it the assigned devices with their own sub-devices. The device from which you opened the window is marked “(this device)”. If you click a device, its information appears on the right and you can go to it directly via Open inventory.